How to enable Jumbo Frames
Configuration
To enable Jumbo Frames, please follow the guide below.
Before carrying out these changes, ensure that your drivers are up to date. If they are not, you may experience performance issues.
Select Start and select Control Panel. Within Control Panel, select Network and Sharing Centre. Now select Change adapter settings from the left hand side of the window.
Right click on the NIC on which you wish to enable Jumbo Frames and select Properties.
You will now be presented with the NIC properties as below:
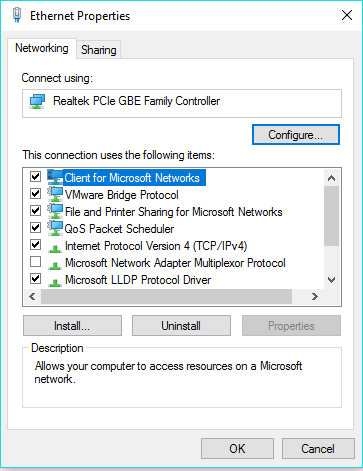
From the NIC properties, select Configure. You will now be presented with the controller properties, this pane will contain several tabs, please select the Advanced tab.
Within the Advanced section, you will see several options in the property field. Scroll down until you can see "Jumbo Frame" as below.
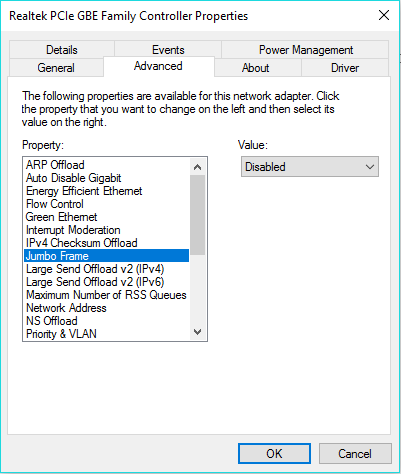
Select the Value button which is set to Disabled in the above example. Select from 2KB MTU - 9KB MTU. NIC properties vary depending on model and manufacturer. In other NIC's the value may need to be entered manually. In this case, enter up to 9000 bytes.
Select OK.
Testing
Open Command Prompt
On 10.10.10.1:
ping 10.10.10.2 -f -l 8000
On 10.10.10.2:
ping 10.10.10.2 -f -l 8000
You should see the following, if this is successful:
Reply from 10.10.10.2: bytes=8000 time<1ms TTL=128
Reply from 10.10.10.1: bytes=8000 time<1ms TTL=128
This is what you'll see if the packet size you are attempting to transmit is too large:
Packet needs to be fragmented but DF set.